|
|
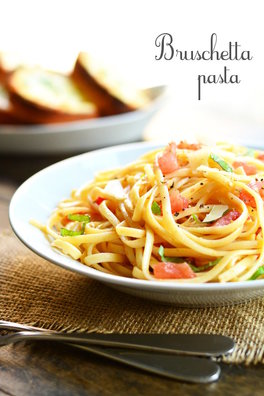
PERFECT SPAGHETTI
1. Use about 5 quarts of water for a pound of pasta. That sounds like a lot, but a common mistake is to use too little water, which leads to the pasta sticking and clumping together. When planning your mealtime, keep in mind that that much water takes a while to boil, especially because you want to start with cold water (as it absorbs the least amount of impurities from your pipes). 2. Choose a pot that will leave you some room on top, so the water doesn’t boil over. 5 quarts of water in an 8-quart pot works well. If all you’ve got is a 6-quart-er, just keep a close eye on it. 3. Bring water to a rolling boil. Thismeans it’s boiling across the whole surface of the water and you can’t stop the boil by stirring it. Putting a cover on the pot will help it reach this point faster. 4. Once boiling, add two tablespoons of salt. The salt boosts the boiling temperature slightly and adds a little flavor to the pasta. But fear not — it only raises the pasta’s sodium content a tiny bit. 5. Add the pasta, and stir it around immediately to keep it from sticking together, as the strands release their starch as they hit the heat. Stir the pot again every few minutes until pasta is done. 6. Consult the pasta package for relatively accurate cooking time. A minute before the minimum given cooking time on the package is up, fish out a strand with tongs and bite into it. The consistency you’re looking for is “al dente” (Italian for “to the tooth”) – tender, but with a little bite. Keep in mind that the pasta will continue to cook a bit even after you remove it from the heat. 7. As soon as the pasta reaches desired doneness, dump it into a colander. Pick up the colander and give it a few shakes to get the water out. But don’t overstrain it – a little wetness works well with sauce. Don’t rinse the pasta either (unless you’re making a cold pasta salad), as it rinses away the starch that coats each strand, and this starch will help the sauce stick to the pasta. 8. Toss pasta with sauce immediately, if you can. If you can’t, toss the pasta with a little olive oil to keep the strands from sticking to each other. |
|
PREP TIME: 10 mins
COOK TIME: 10 mins Serves: 6 INGREDIENTS
|
INSTRUCTIONS
- In a large pot, boil water for pasta as directed on package. When it comes to a boil gently place the tomatoes in using a large spoon and let them cook for 1 minute. Remove with a slotted spoon and set aside. Drop the pasta into the boiling water and cook as directed on package.
- In a large bowl, combine olive oil, basil, garlic, balsamic vinegar, and salt and pepper.
- When the tomatoes have cooled enough to handle, remove the skins from the tomatoes (As you would a peach. Trust me, after boiling it's really easy.) and then dice. Add to the large bowl.
- When the pasta is finished cooking, transfer it with a spaghetti spoon straight from the pot to the bowl of tomatoes. Toss until all pasta is coated. Taste and add more salt and pepper if desired. Add a little of the pasta water if the pasta seems too dry. (You'll want to reserve about ½ cup if you are planning on eating this for leftovers.)
- Serve topped with shaved Parmesan cheese and red pepper.
|
|
RECIPE WEBSITES:
(if you can follow a recipe, you can cook ANYTHING!) |
|
|
|
|
|
|
|
|
|
|
|
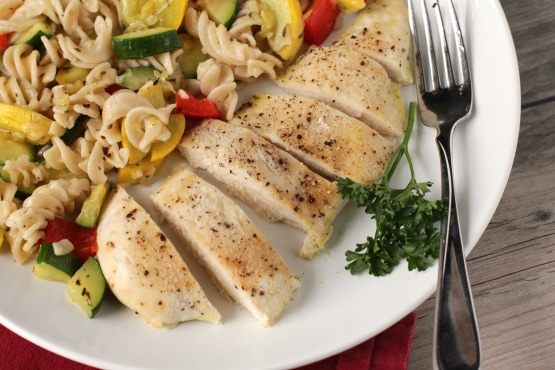
BAKED CHICKEN BREAST
Prep time: 5 mins
Cook time: 20 mins
Total time: 25 mins
Serves: 1 Serving
Ingredients
Sometimes chicken from the butcher’s counter may still have the tenders attached (that’s the thin strip of meat that runs along the underside of the breast, making one side much thicker than the other). Remove these with a knife and save them for another meal.
2. Preheat your oven to 375° F and pat dry each chicken breast with a paper towel.
Despite what you may have learned as a child, don’t wash chicken in the sink, it can spread germs.
3. Place the chicken breast in an oven-proof baking dish.
Drizzle with about a teaspoon of olive oil per breast. You can also squeeze a lemon or lime over the meat to give the meat a little extra moisture as it cooks.
4. Season with salt and pepper, and any herbs and spices.
Chicken breast meat has a reputation for being flavorless, but it tastes wonderful when properly seasoned. Try a pinch of dried rosemary or thyme, paprika, or a spice rub like this one.
5. Put the baking dish in the oven and cook for 15-20 minutes.
Thicker pieces of chicken will require more cooking time. Check the meat after 15 minutes. Pierce the meat with a toothpick or the tip of a knife. If the juices that run out of it are clear, it is done. If they are pinkish or red, return the chicken to the oven for a few more minutes. Remove from oven.
6. Remove the chicken from the baking dish and let it rest on a cutting board.By doing this for a few minutes before you serve, it allows the juices to settle back into the meat. During this time, press your finger into the meat and test its firmness. Remember this degree of firmness so the next time you cook chicken, you can use this as an additional method to test doneness.
If you plan to cook more than two chicken breasts, just use a larger baking dish, and leave plenty of space around each piece of meat. You do not need to increase the cooking time.
Cook time: 20 mins
Total time: 25 mins
Serves: 1 Serving
Ingredients
- 4 oz. raw chicken breast, boneless, skinless
- 1 tsp. olive oil
- Sea salt (or Himalayan salt) and ground black pepper (to taste; optional)
- Preheat oven to 375° F.
- Place chicken in ovenproof dish.
- Drizzle with oil. Season with salt and pepper if desired.
- Bake for 15 to 20 minutes or until chicken is no longer pink in the middle and juices run clear.
- Cooking times may vary depending on the thickness of the chicken breast.
- You can also season chicken with lemon or lime juice and dry herbs like rosemary and thyme.
Sometimes chicken from the butcher’s counter may still have the tenders attached (that’s the thin strip of meat that runs along the underside of the breast, making one side much thicker than the other). Remove these with a knife and save them for another meal.
2. Preheat your oven to 375° F and pat dry each chicken breast with a paper towel.
Despite what you may have learned as a child, don’t wash chicken in the sink, it can spread germs.
3. Place the chicken breast in an oven-proof baking dish.
Drizzle with about a teaspoon of olive oil per breast. You can also squeeze a lemon or lime over the meat to give the meat a little extra moisture as it cooks.
4. Season with salt and pepper, and any herbs and spices.
Chicken breast meat has a reputation for being flavorless, but it tastes wonderful when properly seasoned. Try a pinch of dried rosemary or thyme, paprika, or a spice rub like this one.
5. Put the baking dish in the oven and cook for 15-20 minutes.
Thicker pieces of chicken will require more cooking time. Check the meat after 15 minutes. Pierce the meat with a toothpick or the tip of a knife. If the juices that run out of it are clear, it is done. If they are pinkish or red, return the chicken to the oven for a few more minutes. Remove from oven.
6. Remove the chicken from the baking dish and let it rest on a cutting board.By doing this for a few minutes before you serve, it allows the juices to settle back into the meat. During this time, press your finger into the meat and test its firmness. Remember this degree of firmness so the next time you cook chicken, you can use this as an additional method to test doneness.
If you plan to cook more than two chicken breasts, just use a larger baking dish, and leave plenty of space around each piece of meat. You do not need to increase the cooking time.
