WELCOME TO THE COOKING PAGE!!!
|
|
|
|
|
|
|
|
|
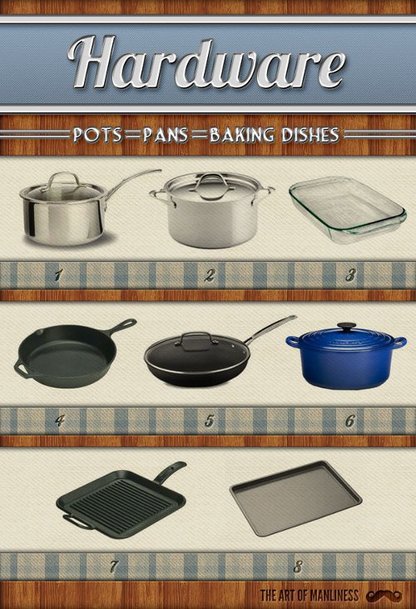
Tip: When buying pots and pans, weight matters. Look for pots and pans that are thick, heavy, and don’t seem like they’d dent if you hit them with a mallet. Thin pots and pans will heat food unevenly and tend to cause scorching. |
SAMPLE LIST:
|
|
SAMPLE LIST:
|
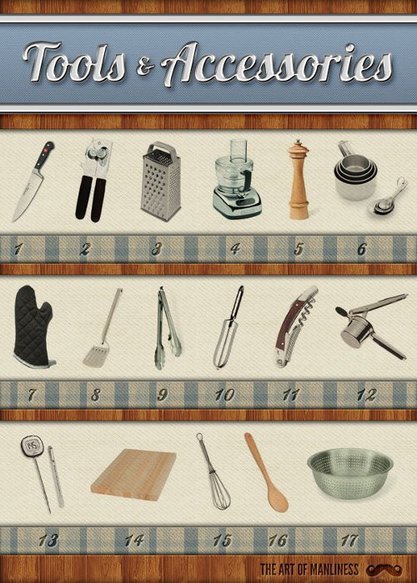
12. Digital Meat Thermometer – a useful tool to make sure your meat is always perfectly cooked.
13. Cutting Board – I prefer a large wood cutting board over any other surface. Make sure it has a solid footing, so as not to slide while cutting. 14. Whisks – extremely versatile; fantastic for making vinaigrette, dressings, or even a roux. 15. Wooden Spoon – heatproof and durable, I like having these in several different sizes. 16. Colander – a must-have for draining, washing, straining, or rinsing. |
|
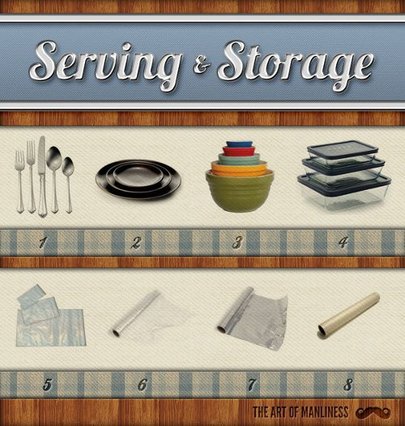
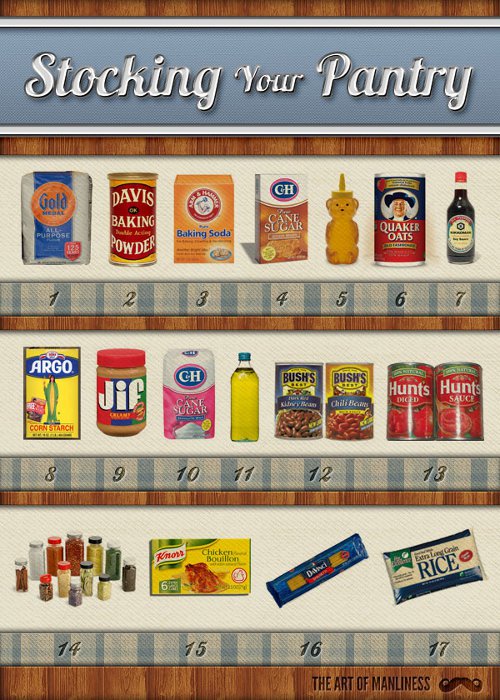
SAMPLE LIST:
|
|
These are the things that will come in handy for a variety of recipes or a spontaneous meal idea, and are always good to have on hand.
|
|
|
|
|
How to Read a Recipe It’s true (and is often said) that all you need to know in order to cook is how to read a recipe. But how do you read a recipe? These tips will up your chances of culinary success. |
| ||
1. First things first, read through the recipe in its entirety. It’s easy to look only at a recipe’s ingredients before deciding to make something. But when it comes time to prepare the dish, you may find you don’t have a tool or ingredient that may only be mentioned in the directions, or that it’s a lot more complicated than you thought, and a little above your pay grade. If the recipe includes terms you don’t recognize, look them up.
2. Add up how much time it will take. Be sure to check out the “prep time” (slicing, stirring, can-opening) and “cook time” (baking, frying, grilling). Add them up to find the total time needed to complete the dish. If it’s your first time making a certain recipe, it will definitely take you longer than the given time; give yourself an ample cushion.
3. Make sure you have all the ingredients. If you think you might have something already, but aren’t sure, check to see. Also make sure it’s still fresh. Then write a list of all the ingredients you don’t have on hand.
4. Take note of what you need to do before the preparations begin. Before you start slicing, dicing, and mixing, you may need to do things like preheat the oven, soften butter, or defrost meat.
5. Set out all of your ingredients and tools. Line up everything you will need: bowls, pans, and utensils are on the counter, ingredients are measured and ready to go. This will not only make things smoother as you go along, saving you from dashing to and from the fridge and the cupboards, but it’s basically a chance to check off the recipe’s ingredient and supply list one more time; you don’t want to get halfway through your preparations, only to realize you’re ¼ cup short of the required 1 cup of flour.
Measuring IngredientsDry Measurements Versus Wet Measurements
When a recipe calls for a ½ cup of this, and 2 cups of that, the tool you reach for depends on whether the ingredient is dry or wet (if it’s pourable – oil, sauce, milk — it’s wet).
There are two options: wet measuring cups and dry measuring cups. While they technically each hold the same volume, there are reasons why you should choose one or the other for respective ingredients.
A liquid measuring cup has small measurement gradients printed up the side, and the top fill line sits well below the spout, so you don’t spill any liquid when you pick up the cup. When you fill a wet measuring cup, don’t hold it in your hand – put it on a level surface and squat down to make sure the liquid is sitting right at the desired mark.
Dry measuring cups are meant to be filled up to the very top, and then leveled off with a knife. If you filled a dry measuring cup to the very brim with a liquid, you’d be bound to spill some. And if you used a wet measuring cup for a dry ingredient, you wouldn’t be able to level it off.
Here’s how you fill a dry measuring cup with a few common ingredients:
Tablespoons Versus Teaspoons
A common mistake beginner cooks make is to confuse the tablespoon with the teaspoon, as they are often abbreviated in recipes in different ways, and these abbreviations are very similar. You may see any of the following:
You can use tablespoons and teaspoons for both wet and dry ingredients. A recipe may call for a level or rounded amount; rounded roughly sits above the rim of the spoon, level is done by scraping off the top with a knife.
Butter
A stick of butter will have the measurements printed on the wrapper of each stick. Just mark off what you need and cut through the butter, wrapper and all.
2. Add up how much time it will take. Be sure to check out the “prep time” (slicing, stirring, can-opening) and “cook time” (baking, frying, grilling). Add them up to find the total time needed to complete the dish. If it’s your first time making a certain recipe, it will definitely take you longer than the given time; give yourself an ample cushion.
3. Make sure you have all the ingredients. If you think you might have something already, but aren’t sure, check to see. Also make sure it’s still fresh. Then write a list of all the ingredients you don’t have on hand.
4. Take note of what you need to do before the preparations begin. Before you start slicing, dicing, and mixing, you may need to do things like preheat the oven, soften butter, or defrost meat.
5. Set out all of your ingredients and tools. Line up everything you will need: bowls, pans, and utensils are on the counter, ingredients are measured and ready to go. This will not only make things smoother as you go along, saving you from dashing to and from the fridge and the cupboards, but it’s basically a chance to check off the recipe’s ingredient and supply list one more time; you don’t want to get halfway through your preparations, only to realize you’re ¼ cup short of the required 1 cup of flour.
Measuring IngredientsDry Measurements Versus Wet Measurements
When a recipe calls for a ½ cup of this, and 2 cups of that, the tool you reach for depends on whether the ingredient is dry or wet (if it’s pourable – oil, sauce, milk — it’s wet).
There are two options: wet measuring cups and dry measuring cups. While they technically each hold the same volume, there are reasons why you should choose one or the other for respective ingredients.
A liquid measuring cup has small measurement gradients printed up the side, and the top fill line sits well below the spout, so you don’t spill any liquid when you pick up the cup. When you fill a wet measuring cup, don’t hold it in your hand – put it on a level surface and squat down to make sure the liquid is sitting right at the desired mark.
Dry measuring cups are meant to be filled up to the very top, and then leveled off with a knife. If you filled a dry measuring cup to the very brim with a liquid, you’d be bound to spill some. And if you used a wet measuring cup for a dry ingredient, you wouldn’t be able to level it off.
Here’s how you fill a dry measuring cup with a few common ingredients:
- Flour — lightly spoon into cup and level off with knife. Don’t tap the cup to settle, or pack in with spoon or fingers.
- White sugar — scoop directly from bag/container. Level off with knife.
- Brown sugar – scoop and then press with back of a spoon until the sugar is level with the brim of the cup.
- Peanut butter/shortening – pack with spatula (spraying the cup with cooking spray before using PB will result in it sliding out easier).
Tablespoons Versus Teaspoons
A common mistake beginner cooks make is to confuse the tablespoon with the teaspoon, as they are often abbreviated in recipes in different ways, and these abbreviations are very similar. You may see any of the following:
- Tablespoon: T, tb, tbs, tbsp, tblsp, tblspn. (May be capitalized or lower case)
- Teaspoon: t, ts, tsp, tspn. (Almost always lower case)
You can use tablespoons and teaspoons for both wet and dry ingredients. A recipe may call for a level or rounded amount; rounded roughly sits above the rim of the spoon, level is done by scraping off the top with a knife.
Butter
A stick of butter will have the measurements printed on the wrapper of each stick. Just mark off what you need and cut through the butter, wrapper and all.
